Sewing Tutorial: Log Cabin Potholders Made From Fabric Scraps
January 12th, 2017
This is a great little sewing project for using up some fabric scraps. Pretty easy to sew together, the most time consuming part is going through the scrap pile and trimming each piece of fabric to size.
Materials List:
- fabric scraps: center square is 3″ x 3″ and you will need scraps that are at least 2″ wide
- fleece or old towel/terry cloth about 9″ x 9″ for batting
- flannel or heavy weight cotton 9″ x 9″ for backing
- one fat quarter for making bias binding
- scissors
- quilting ruler
- rotary cutter (optional)
- cutting board
- pencil / fabric marker
- pins
- thread
- sewing machine
- iron and ironing board

Log Cabin Block

Cut a 3″ x 3″ square for the center piece.
Cut the 2″ wide fabric scraps into these lengths:
- 3″ (1 for each potholder)
- 4.5″ (2 for each potholder)
- 6″ (2 for each potholder)
- 7.5″ (2 for each potholder)
- 9″ (1 for each pot holder)
Arrange your pieces of fabric and sew together in the order that is pictured above. Seams are 1/4″.
It helps to have an iron nearby as you will be pressing seams to one side after sewing each and every section.
Sew center to 1; press seam; sew on 2; press seam; sew on 3; press seam … continue until 8.
The finished block is 9″ x 9″.
Individual blocks can be turned into pot holders, or you can make a whole bunch of them and piece them together to make a patchwork quilt.
How to Make a Potholder

Trim edges so the block is square. Round off edges. There are two reasons I round off the edges. 1. I like the look of it, and 2. No need for mitered corners when sewing on the binding.

Stack layers together. Here, I have pieced together the backing to make up the 9″ x 9″. I’m using a layer of fleece and a layer of terry cloth for the middle padding.

Pin layers together. I trimmed the middle layers so that I could see the backing piece and be able to stack all the layers properly. Make sure backing is facing right side down (wrong side up).

Quilt layers together. You can stitch in any pattern you like. I started in the middle and followed the square spiral pattern of the log cabin. Trim so that all layers are even.

Make the hanging loop (optional). I keep my potholders in a drawer near my stove, so I don’t need a hanging loop, but I sew one on anyway to give me the option of hanging them up.

Loop is a scrap that is about 2″ x 5″, folded in half length ways, and then both edges folded into the middle crease. Use an iron to press the creases. Stitch 1/8″ in from both edges.

Pin the loop on the back and stitch in place.
I like to have the loop in a corner, you may like to have the loop in the center of an edge, it’s your preference.

Bias Binding
Cut a 38″ – 40″ length of 2.5″ wide binding for each potholder. (How to Make Continuous Bias Binding Tape)
Open up the binding and fold the diagonal end by 1/2″. Press with an iron to make the crease. You will be pinning the binding to the back of the potholder.

Fold binding in half again and start pinning all the way around.

Use lots of pins. The bias binding is stretchy and is good for going around the rounded corners.

When you pin all the way around to where you started, you will have excess binding. Cut the excess off at a diagonal so that the end overlaps the beginning by about 1/2″.

Tuck the end into the folded edge and pin in place.

Sew about 3/8″ from the edge. On my sewing machine I have the needle position in the middle of the foot and line up the edge of the foot with the edge of the fabric. I like to start sewing where the binding overlaps. Go slow, especially around the corners, lifting up the foot and re-positioning the fabric as needed. Take pins out as you sew. Backstitch at the beginning and end.

Turn the binding to the front side of the potholder.

If you like, you can pin the binding in place, but I don’t because I’m a bit lazy and just sew in place by going slow and holding the binding in place with my fingers as I sew. Stitch 1/8″ in from the inside edge of the binding. Backstitch at the beginning and end and you’re done!


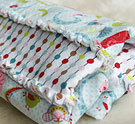 An Easy and Simple Way to Make a Baby Rag Blanket
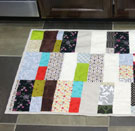 A Scrappy Patchwork Rug for the Kitchen – Another Easy Sewing Project
 How to Stitch a Triple French Knot
 Curtains Makeover – From Dreary to Cheery

